Showing posts with label Vegan. Show all posts

Thursday, October 15, 2015

Instant Modak (ମୋଦକ)

Modak (ମୋଦକ) is offered to Ganesha during the Ganesh festival.  There are several different varieties of modaks, fried, steamed and a whole genre of fillings. Coconut is the most popular filling. I call my recipe instant modak coz it's very easy and simple to make. Most of the time I'm also constrained to the kind of ingredients I have at hand. I usually buy frozen shredded coconut to use in my recipes and I've used the frozen kind in this recipe, although there is no denying the taste of fresh coconut. The modak has two components, one the filling and then the outer covering. The outer covering can be made out of wheat flour or all purpose flour and the inner filling is usually made out of coconut, jaggery, or sometimes lentils. 

I like it when desserts take less time to make coz then you can eat them sooner than later. Life is short, who wants to wait for dessert right? ;) 

So here goes ...


PREP TIMECOOKING TIMESERVES
5 minutes 20 minutes Makes 7 - 8 medium sized Modaks 

INGREDIENTS

Ingredients  Quantity
All purpose Flour 1 cup
Jaggery/Sugar - adjust the quantity based on your sweet cravings ;) 10 Tablespoon
Shredded Coconut 1/2 cup
Ghee 3 - 4 Tablespoon
Cardamom powder (Elaichi powder) 1 Teaspoon

PREP
  • If you are using fresh coconut, shred them and keep them aside
  • The kind of jaggery I get is usually comes in big pieces so I ground it to powder. I put the jaggery in a plastic bag and use a hammer to powder it down
PROCEDURE

  • For the filling: In a small bowl, add your shredded coconut, powdered jaggery and elaichi (cardamom) powder. Mix and put it in the microwave for 10 seconds. This will met the jaggery a bit and makes it easy to mix in with the coconut. 

  • For the outer shell: Add a pinch of salt to the all purpose flour, add a little water and make a dough. Same consistency as you will to make chapatis. 
  • Take a small amount of the dough and roll it out to make a small circle

  • Add a little of the filling in the centre

  • Take it in your palms now and start pinching in the edges, when you've made a few pleats, pinch them all together. 
  • Heat oil in a frying pan, test the oil by putting a small piece of the dough in it. If the piece starts sizzling, your oil is ready
  • Add the modaks and fry them till they're golden brown
  • Your modaks are now ready to be devoured 


SERVING SUGGESTIONS
Eat Modak on it's own, it's more like a sweet dumpling :) 


Feedback and comments always welcome! 


Wednesday, May 13, 2015

BIDESI DALMA (ବିଦେସି ଡାଲମା) (One pot Lentil Dish)

Dalma (ଡାଲମା) is a traditional Odia dish made of lentils and vegetables. I've named my dish Bidesi Dalma, bidesi means foreign. Traditionally in Dalma some very specific vegetables like raw banana, pumpkins and other root vegetables are used, I do not have access to these vegetables easily so I make do with whatever I have at home hence the name foreign Dalma or bidesi dalma. 

It is an easy dish to prepare and is full of nutritious goodness of the lentil and vegetables. Dalma (ଡାଲମା) is usually made with ghee (clarified butter), I am not a big fan of ghee so I've used regular vegetable oil, but the true dalma lovers will swear that all the taste comes from ghee. The other two ingredients that add to the flavour are fresh shredded coconut and a special spice powder made out of cumin and red chillies. Fresh shredded coconut enhances the taste tremendously but if you don't have access to that, unsweetened desiccated coconut will also do. 

Dalma (ଡାଲମା) is often prepared in temples and served with hot rice. The Dalma we prepare at home and the one in temples is very different tasting, the one in the temples is often made using mud pots on wood fire. There are different types of Dalma, one of them is called Habisa Dalma which is often prepared in the month of Kartika (usually starts end of October and goes on for about 4 weeks based on the positioning of sun, moon and other important planetary objects :) ). During this time people give up non-vegetarian food. This month is considered very auspicious and many pilgrimages are done during this time. My fond memories of this time include walking to the local temple early morning with my grand mother and watching other grannies meticulously perform holy rituals. Though I've always believed that time is neither good nor bad it's usually actions and thoughts that can be good or bad. Everyday is auspicious if you want to do something good and generous. Now, without getting too preachy let's jump into our recipe. So here goes...


PREP TIMECOOKING TIMESERVES
10 minutes30 - 40 minutes 3 - 4

INGREDIENTS

Ingredients  Quantity
Assorted Vegetables 
(I've used potatoes, zucchinis, carrots, drumsticks, green beans, eggplants and tomatoes)
2 cups approximately
Toor Daal7 - 8 Tablespoon 
Ginger1 inch
Onions1 medium sized
Shredded Coconut or desiccated coconut3 - 4 tablespoon or more depending on how much you like coconut ;)
Panch Phutana - 5 spice mix 
Read more on wikipedia 
1 teaspoon
Bay leaves1
Dry Red Chillies 4 - 6
Cumin Seeds (Jeera) 3 - 4  tablespoon
Oil/ Ghee
(I used vegetable oil)
1 Tablespoon
Turmeric1/2 tea spoon
Coriander leaves for garnisha small bunch 
SaltTo taste

PREP
  • Wash and cut your vegetables into medium sized pieces

  • Finely shred the ginger
  • Dry roast cumin seeds and dry red chillies until you get a nice aroma of the cumin seeds. Put this into a food processor/blender and grind to make a fine powder
  • If you have access to fresh coconut, shred coconut, the more the merrier ;)

PROCEDURE
  • Use a pressure cooker to cook you lentils and vegetable, if you don't have one you can always use a regular pot. You only have to half cook your lentils and vegetables. Put the hard to cook vegetables in the pressure cooker. Add the finely shredded ginger to this mix. 
  • Once the vegetables are half done, now add your easy to cook vegetables like zucchini, green beans and tomatoes. Cook for 2 - 3 minutes 
  • Take a separate pot, add oil, add the panch phutana (if you don't have panch phutana - take fenugreek seeds (methi), nigella seeds (black onion seeds or kalonji), black Mustard Seeds (rai), fennel Seeds (saunf) and cumin seeds (jeera) in equal proportions to make one teaspoon approximately)
  • Add chopped onions and 1- 2 red chillies and fry until the onions are golden brown
  • Now add the lentil and vegetable mix from the pressure cooker
                             
  • Cook until all vegetables are almost done, now add the cumin and chilly spice powder that we prepared. Save a little bit for garnish

  • Add salt to taste and top it all of with shredded coconut and coriander leaves.
  • Your bidesi dalma is now ready to be devoured :)


SERVING SUGGESTIONS
Serve hot with rice. 

Feedback and comments always welcome! 


Wednesday, April 22, 2015

BAIGANI (ବାଇଗଣି) - EGGPLANT FRITTERS

Baigani (ବାଇଗଣି ) or eggplant fritters are basically a different avatar of pakoras (ପକୁଦି). Pakoras (ପକୁଦି) are the perfect rainy day mate. In India the monsoon season usually starts around July and stays for a good month or two. The monsoon season is one of the most awaited of all and gives a relief from the intense summer. I remember in my childhood, summers would sometimes be as hot as 48 degrees celsius.  Odisha is usually hit pretty hard by the monsoon season as well. July is one of the wettest months, with some major flooding in the rivers. It is both a boon and a bane to the Odia farmers. 

"Baigani"(ବାଇଗଣି) is a deep fried eggplant dish which is often consumed as a snack with tea (ginger tea - mmmm). You can also make similar kind of pakoras using potatoes or zucchinis. Some people use baking powder in their recipe for baigani, but I like to keep it simple and straightforward. To fry the baignis, I've used a Kadhai. Kadhai (କଡେଈ) is a deep, thick-bottom circular dish, if you don't have one, just use any deep dish that you have, a wok would work fine. Speaking of kadhais, all households in Odisha and even other states have a "tela-kadhai" permanently in the kitchen [ତେଲ / Tela means oil]. Often mom's will whip up something fried if meals are a little plain jane, and specially during monsoon, the tela-kadhais work quite a lot ;) so they earn their respect in the kitchen. 

So let's get our hands oily ;) Oh and this time I've included some videos of the making process for your viewing pleasure.  So here goes...


PREP TIMECOOKING TIMESERVES
5 minutes10 minutes 2 

INGREDIENTS

Ingredients  Quantity
Eggplant I used half of a big sized eggplant. Depending on how many pieces of fritters you want, adjust your eggplant quantity
Chickpea Flour5 - 6 Tablespoon (this might vary based on the size of the eggplant or the number of pieces you plan to make)
Green Chillies (optional)1 - 2
WaterDouble the amount of chickpea flour ; enough to make a thin semi-liquid paste
Oil
(I used vegetable oil)
Enough for deep frying; if you don't want to deep fry you can shallow fry too
Turmeric1/2 tea spoon
Ginger powder (optional)1/2 tea spoon
SaltTo taste

PREP
  • Cut the eggplant into circular pieces and put them in water (putting them in water makes sure they don't become discoloured while you complete your prep)
                          
  • Put your wok on the stove and add sufficient oil for deep frying

PROCEDURE
  • Take a wide bowl, put your chickpea flour and add water such that it's enough to make a light paste
  • Add salt, turmeric powder and green chillies. You can also add ginger powder for added flavour. 
  • After the oil is heated adequately, you can start frying the fritters by dipping the eggplant pieces in the chickpea paste so they form a thin but not too thin layer on the eggplant. [You can put a drop of the chickpea paste in the oil to test if the oil is hot enough, if it's hot the chickpea droplet will start to sizzle and bubble up like a really peppy song ;)]
  • Fry them until they're golden brown on both sides
             
  • After they're done, put them on tissues to get the excess oil out. They're now ready to be devoured. Don't tell me you forgot your tea, get that water boiling :)

SERVING SUGGESTIONS
Serve hot with chutney or enjoy them without any condiments. Sriracha goes really well with these. 

Feedback and comments always welcome! 


Wednesday, April 8, 2015

ROTI NOODLES

We all want to eat healthy and be healthy but the truth is everything that's yummy isn't always the healthiest like cheesecake? (so yumm!) Anyways so my fight to find food that's healthy as well as yummy continues. I found this recipe from a blog that I follow - http://www.rakskitchen.net/. I modified it just a little and reduced the number of ingredients and it still turned out really delicious. 


I love noodles and pasta in all forms, shapes and sizes. I also love rotis (flat bread, made from stoneground wholemeal flour, traditionally known as atta flour). This dish combines the best of both worlds. So here goes...


PREP TIMECOOKING TIMESERVES
10 minutes10 minutes 2 

INGREDIENTS

Ingredients  Quantity
Cooked Rotis2 - 3
Mixed Vegetables
(I used onions, cabbage, broccoli and carrots)
1 cup
Onions1 teaspoon
Green Chillies1 - 2
Soy Sauce (I used this one) 2 teaspoon
Tomato Sauce1 blob or to taste
Chilly Sauce (I used this one )1 blob or to taste 
Spring Onions (optional)1 sprig
Water1:2 ratio for Rice : Water
Oil/Butter2 Tablespoons (I've used vegetable oil but you can use olive oil or butter)
SaltTo taste 

PREP
  • This dish works really well with left over rotis, but you can make fresh rotis too. 
  • Dice the onions and cut green chillies into small pieces or slit them in the middle to make two long halves of each chilly
  • Cut your vegetables the way you like it with your noodles. 
  • Cut your rotis lenghthwise to make long noodle like strands. If you don't have rotis, try using tortillas.

PROCEDURE
  • In a wok add oil, when the oil heats up add green chillies and onions. I have not used ginger or garlic for this dish but feel free to use them
  • When the onions become a little brown, add your vegetables

  • Fry them until they're almost done and then add the roti strands

  • Add soy sauce, tomato ketchup and chilly sauce , mix it all up and fry for 4 - 5 minutes. The sauces are up to you, anything you like, splash them on. You can also not use any sauce and just add a dash of salt and pepper, making it super healthy and a low sodium treat.

  • Sprinkle some spring onions and your roti noodles are now ready to be devoured. ;)


SERVING SUGGESTIONS
Serve hot and enjoy :) If you like it even more spicy, Sriracha sauce is your pal. 

Feedback and comments always welcome! 


Saturday, March 21, 2015

Khechidi/Khichri - Lentil and Rice Comfort Food


Khechidi/Khechudi/Khichri, yes it has that many names and some that I probably don't know of since in different parts of India it has a different name. It is one of my most favourite comfort food. It is nutritious and light on tummy. When I was a child mom would often make khechidi when I was sick as it gave the digestive system a break without compromising on nutrition. Khechidi was also a favourite on mom's fasting days since it's easy to make and uses very few ingredients. It's one of those foods, you either love it or you hate it, for me I associate it with days when my mom would be beside me comforting me due to illness, but I cleverly wipe out the "being sick" part and remember the "mom being close" part hence all the warm memories around khechidi.

Rice and lentils are the major ingredients of Khechidi. It can be made of several different kinds of lentils. I've used toor daal, but it can made out of moong beans, channa daal (yellow-split peas), green moong daal and even red lentils.  I've twisted my mom's recipe a bit coz am crazy about tomatoes :) You can also put vegetables in it to increase it's nutritional value. It can be a great addition to your detox week.

[Learn More about Khechidi: http://en.wikipedia.org/wiki/Khichdi]
[Here's an interesting Elephant journal article on Khichdi : http://www.elephantjournal.com/2013/03/whats-so-amazing-about-khichadi/]

Khichdi - rice and lentil comfort food


PREP TIMECOOKING TIMESERVES
10 minutes20 minutes2 - 3

INGREDIENTS

Ingredients  Quantity
Raw Rice 1 cup
Toor Daal (Lentils) 6 tablespoons [I've used Toor daal, but you can use any other lentil that you have at home]
Cumin Seeds1 teaspoon
Onion1 medium sized
Tomato1 medium sized
Gingera small piece
Green Chillies1 - 2 
Turmeric Powder1 teaspoon
Water1:2 ratio for Rice : Water
Oil/Ghee2 Tablespoons (I've used vegetable oil but you can use olive oil or butter)
SaltTo taste 

PREP
  • Soak the rice and lentils for atleast an hour before you cook. Soaking lentils removes the phytic acid content in them, making it easier for you to absorb all the nutrients from the lentils. I found this interesting article about beans/legumes and phytic acid that you might want to read - http://www.phyticacid.org/soaking-beans/
  • Dice the onions and tomatoes
  • Cut the green chillies into small pieces or slit them in the middle to make two long halves of each chilly
  • I used a pressure cooker to cook this dish, pressure cooker cooks food quickly and it's an item you'll find in all Indian homes.  Since we make a lot of lentil based dishes, it is a must have. If you don't have access to a pressure cooker you can use a regular pot to cook this dish though it might take longer to cook. (Make sure you soak your lentils longer if you're cooking in a regular pot)
PROCEDURE
  • In your pressure cooker add oil 
  • When the oil heats up, add cumin seeds, green chillies and ginger

  • Add the diced onions and fry them
  • Add tomatoes
  • Add the rice and lentil mixture
  • Add turmeric powder and stir fry for 2-3 minutes

  • Now add water. I keep a 1 : 2 ratio rice to water. You can adjust based on the consistency you are looking for. More water means delicious gooey consistency.  
  • Close the pressure cooker lid and cook until you hear atleast 2 whistles. 
  • Turn the burner off and pressure cooker off the burner and let the khichdi cook in it's own warmth
  • If you are using a pot instead of a pressure cooker, boil water separately in a pot and add it to the rice-lentil mixture. Do not add cold water, it will hamper the cooking process and will affect your cooking time dramatically. You'll have to keep checking in to make sure you cook until both rice and lentil are cooked. 


SERVING SUGGESTIONS
Khichdi goes really well with plain yoghurt or raita. My favorite combination is khechidi and tomato pickle. Some people also eat it with ghee.

Feedback and comments always welcome! 


Sunday, February 22, 2015

SPICE-LIOUS WINTER STEW

While I wish when I wake up tomorrow I don't have to wear my winter jacket, winter boots or get static electricity shocks every now and then, that I know is not going to happen. So I'm going to do what a good friend of mine tells me "Suck it up buttercup". It's snowing outside again and that makes me crave for some wintery stews and soups. So today I am going to share one of my mom's recipe. Even though it is not a typical Odia recipe but I can assure you that it will bring the same warmth and homeliness :) 

Odisha is hot almost all year round, so winter is when we have access to fresh vegetables. Keep in mind that I am talking about a time when frozen fruits and vegetables were not easily accessible, so vegetables like bell peppers, carrots etc would be fresher in winter than in summer. 

This stew has lots of spices that makes it the perfect winter weekday dinner, calming, soothing and invigorating at the same time. Hope you enjoy making it. Here goes:


PREP TIMECOOKING TIMESERVES
10 minutes20 minutes4 - 5

INGREDIENTS

Ingredients  Quantity
Assorted Vegetables (select your favourite vegetables)
I used carrots, green beans, zucchini, broccoli
3 - 4 cups (the more the merrier)
Onions1 medium sized
Tomato1 medium sized
Green chillies2 - 3
Bay leavesa pinch
Whole Black pepper4 - 5 (add more to make the stew more spicy)
Cloves4 - 5 
Cinnamon  1 stick ( you can use cinnamon powder as well )
Vegetable broth (optional)1 small mason jar / 1 and half cup
Water1 small mason jar / 1 and half cup
Oil 2 Tablespoons (I use vegetable oil but you can use olive oil or butter)
Mung beans1/2 cup
SaltTo taste 

PREP
  • Wash all the vegetables thoroughly and dice them into small pieces, don't make them too small because we want a chunky stew.
  • Dice the onions and tomatoes
  • Cut the green chillies into small pieces 

  • Pressure cook the mung beans. If you don't want to use mung beans or don't have them ready, you can always use chickpeas or canned kidney beans. Mung beans add the protein to this dish. 


PROCEDURE
  • Heat your soup pot on medium heat and add oil
  • Now add the bay leaves. cloves, whole black peppers and the cinnamon stick
  • You'll start getting a really sweet aroma from all the spices, make sure not to burn them and always maintain medium heat

  • Add the green chillies 
  • Add the diced onions and fry them

  • Add the hard to cook vegetables first, I added the green beans and carrots first. Cook for about 5 minutes and add the easy to cook vegetables, I added zucchini and broccoli

  • Add salt and stir fry the vegetables for around 5 minutes more and then add the lentils or beans 
  • Now add the vegetable stock and equal amount of water
  • The last step is to add the tomatoes 

  • Cover and cook until vegetables are done


SERVING SUGGESTIONS
Serve hot with a bread or you can have it all by itself.

Feedback and comments always welcome! 


Sunday, February 15, 2015

BAIGANA BHAJA (PAN SEARED EGGPLANT)

A typical vegetarian odia meal usually consists of rice, daal (lentils), paga (a deliciously tangy mixture that can be made of a variety of ingredients) and bhaja (pan seared or stir fried vegetables). Bhaja is the generic term that applies to different kinds of stir fried or pan seared side dishes. 

Baigana bhaja (pan seared eggplant) has been an all time favourite of mine. It is an easy to make side dish that goes well with the rice and daal combination or even with chapatis/rotis. 

PREP TIMECOOKING TIMESERVES
5 minutes10 minutes 3 - 4 

INGREDIENTS

Ingredients Quantity
Eggplant 1 big or medium 
Rice Flour 2 Tablespoons
Turmeric 1 teaspoon
Ginger paste     1 teaspoon
Oil 2 teaspoon
Salt To taste

PREP
  1. Wash the eggplant thoroughly and cut it into circular pieces
  2. In a bowl make a watery mixture of rice flour, turmeric, ginger paste and salt
  3. Marinate the eggplant slices in the mixture coating them evenly, let it rest for 15 - 20 minutes

PROCEDURE 
  1. Heat a flat pan 
  2. When the pan is hot add 1 teaspoon of oil and the marinated eggplant slices
  3. Roast equally on both sides until done


SERVING SUGGESTIONS
Serve hot with rice and daal or chapatis. My husband is a big fan of yoghurt and rice, baigana bhaja goes well with that too. My grandma puts a little bit of tomato ketchup on it and that tastes awesome too. 


WHERE CAN YOU FIND THESE INGREDIENTS
If you are not in India, you can easily find all the ingredients at any Indian Grocery store. In Canada I know that Loblaws, Food Basics, Freshco and Farmboy carry almost all of these ingredients

Feedback and comments always welcome! 


    TOMATO PAGA (ROASTED TOMATO SIDE DISH)

    Paga is the term that we odias apply to the genre of tangy mixtures that we eat with rice and daal. Rice and daal can be pretty bland on their own, paga adds the zing to the plate. "Paga" does not have a fixed recipe, you can create your own combination of ingredients that make most sense to you. Paga can be made with tomatos, potatoes, eggplants, yoghurt, make it tangy and zingy and you have your own paga recipe. 

    The Tomato paga recipe that I will share today is a really simple one with just 4 major ingredients. 


    PREP TIMECOOKING TIMESERVES
    20 minutes5 minutes 2 - 

    INGREDIENTS

    Ingredients Quantity
    Tomato 1 big or medium 
    Oil 1 teaspoon
    Onions 1/4 medium sized
    Coriander leaves     a tiny bunch
    Lemon 2 Tablespoon
    Salt To taste

    PREP
    1. Wash the tomato thoroughly.
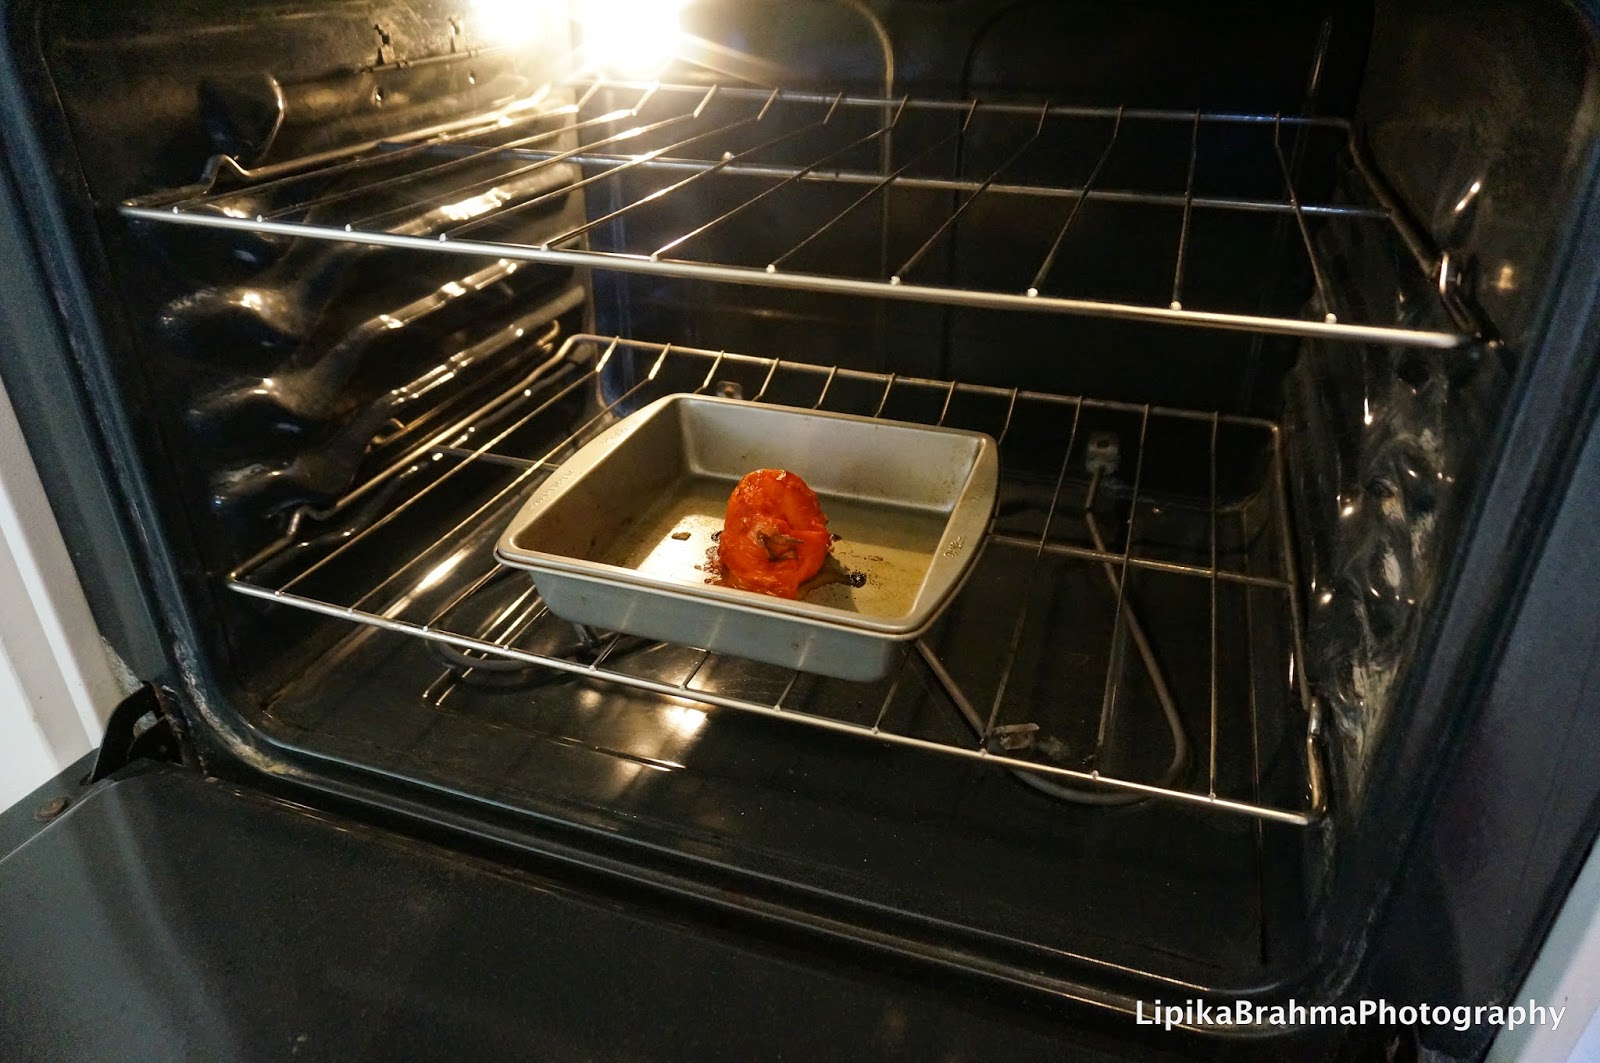
    2. Preheat your oven to 375 degrees F.
    3. Coat your baking tray with oil and place the tomato in it.
    4. Roast the tomato for around 15 - 20 minutes such that you can take the skin off the tomato easily. For the last 3 minute put your oven on broil. 
    5. If you have access to a gas stove or a barbecue machine you can roast the tomato directly on it. 
    6. Finely chop onions and coriander leaves


    PROCEDURE 
    • Once the tomato is roasted transfer it to a bowl and use your hands to mash it
    • Add lemon, chopped onions, coriander leaves and salt to taste

    SERVING SUGGESTIONS
    Serve with rice and daal. They also go really well with pakhala, I'll save that recipe for summer. ;)


    WHERE CAN YOU FIND THESE INGREDIENTS
    If you are not in India, you can easily find all the ingredients at any Indian Grocery store. In Canada I know that Loblaws, Food Basics, Freshco and Farmboy carry almost all of these ingredients

    Feedback and comments always welcome!